Installing Proxmox VE on OCI
Proxmox Virtual Environment is a great virtualization platform. And Oracle Cloud Infrastructure seems to provide virtual machines for free forever. The regular x86_64 instance has only 1/8 OCPU and 1 GB RAM. However, the new Ampere instance is aarch64 (arm64) architecture. With 4 Neoverse N1 Cores and 24 GB RAM, we can fire up some decent containers on it.
However, Proxmox doesn’t officially provide the tutorial (or even workarounds) to install Proxmox VE on an ARM computer. So we need to switch to a project called Pimox. This project is used to install Proxmox VE to a Raspberry Pi, which is also ARM64 architecture. So we can use it to install.
The ARM instance that OCI provided us is already KVM virtualized, and no nested virtualilzation is enabled. So you can only deal with LXC containers.
How?
I will teach you to step by step.
First, log in to your Oracle Cloud console and jump right to the ‘Instances’ page. Create an Ampere instance.
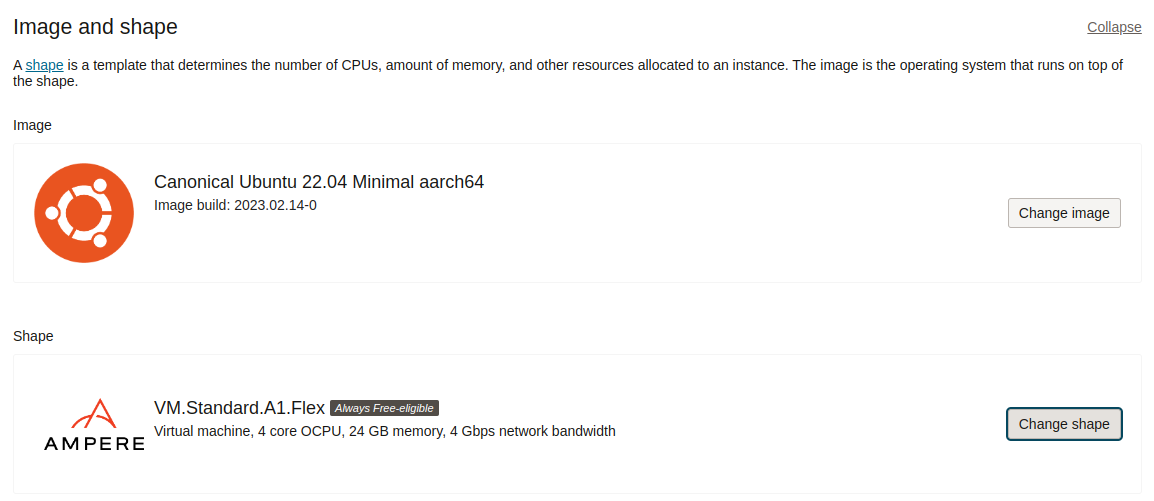
The OS doesn’t matter, we will replace it later.
Next, set up your firewall to let all traffic go to the virtual machine.
If you know exactly what you are doing, you can not follow this step.
Go to ‘Console Connection’, and Click ‘Launch Cloud Shell Connection’.
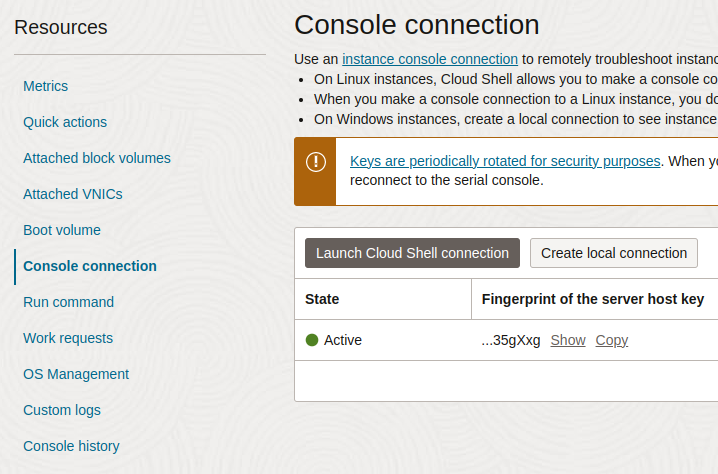
A Cloud Shell session would appear. Don’t do anything yet.
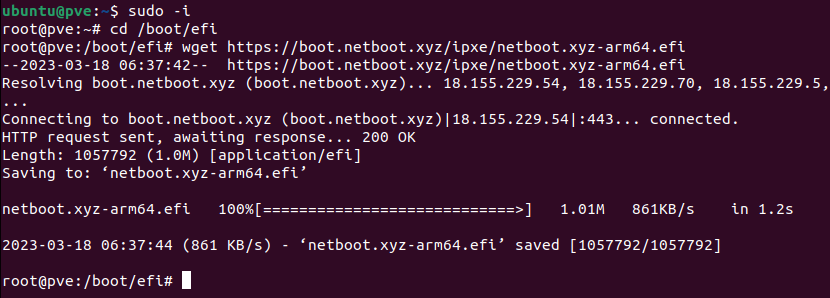
SSH to the machine, and download the EFI files we need.
sudo -i
cd /boot/efi
wget https://boot.netboot.xyz/ipxe/netboot.xyz-arm64.efi
After that, disconnect from the machine. And go back to the OCI console.
Click ‘Reboot’ on the top of the detail page. And check ‘Force reboot the instance by immediately powering off, then powering back on’.
Now pay attention, once the machine starts to reboot, focus on the Cloud Shell page, and smash your ESC button. Until you enter a BIOS-like page like below.
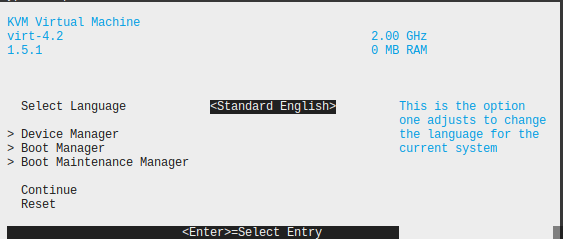
Control the page with your arrow keys. Navigate to ‘Boot Maintenance Manager’ -> ‘Boot From File’ -> Choose your only hard disk -> ’netboot.xyz-arm64.efi’.
Then you will enter the iPXE interface which netboot offers.
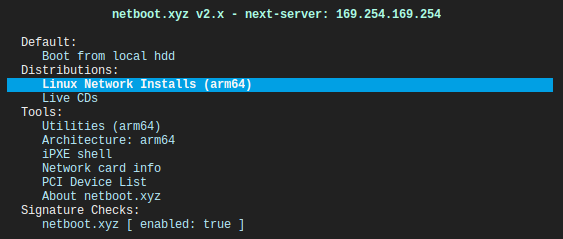
Navigate to ‘Linux Network Installs’ -> ‘Debian’ -> ‘Debian 11.0 (bullseye)’ -> ‘Text Based Install’
And you will enter the normal Debian netinst page.
Now please point a domain to your machine. So if your domain is pve.contoso.com and your IP is 1.1.1.1, you should add an A record.
Use ‘pve’ as your hostname, and ‘pve.contoso.com’ as your domain in this case.
Then finallize your Debian installation as usual.
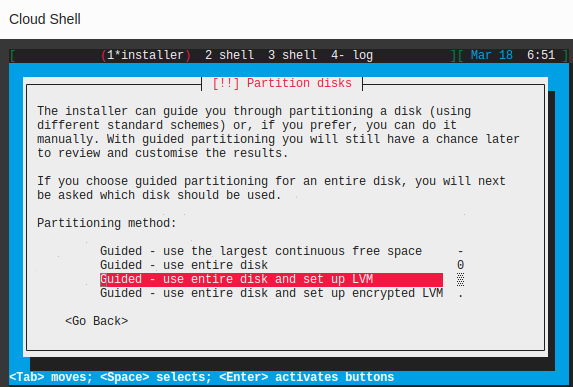
When you are setting up the partitioner, select ‘Guided - use entire disk and set up LVM’ instead of the default one. Proxmox prefers LVM.
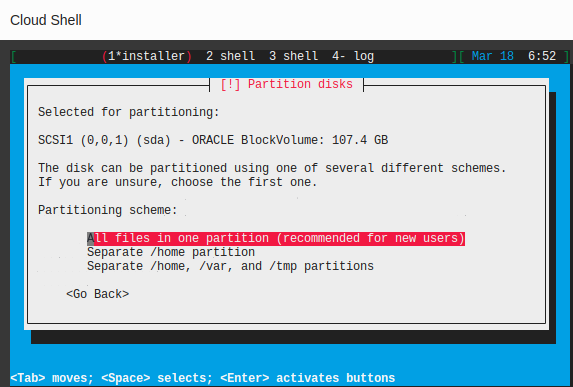
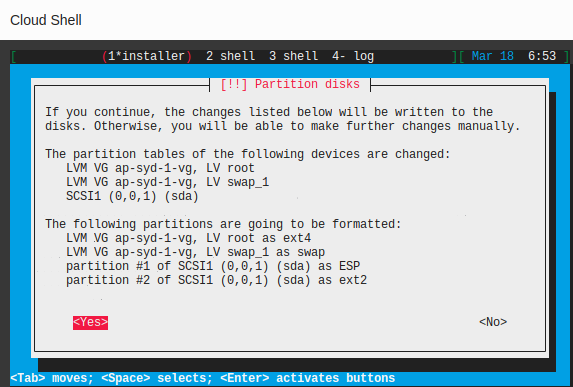
Leave everything default for the rest of the installation.
After finishing the Debian installation, log in to your machine in the Cloud Shell use the root user and put your SSH key in ~/.ssh
By default, OpenSSH Server doesn’t allow users to SSH to the machine using the root user with a password. However, you can do it as long as you have an SSH key.
OpenSSH would ask you to delete the host key since we have changed our OS. Don’t be frightened by them.
After SSH to the machine, install some useful software.
apt install sudo wget curl iftop vnstat neofetch vim nano net-tools
Check your IP using the following command.
ip address
In my case, it is 10.0.117.132.
Use your favorite editor to open /etc/network/interfaces. The default one looks like this.
# This file describes the network interfaces available on your system
# and how to activate them. For more information, see interfaces(5).

source /etc/network/interfaces.d/*

# The loopback network interface
auto lo
iface lo inet loopback

# The primary network interface
allow-hotplug enp0s3
iface enp0s3 inet dhcp

Change to the following:

# This file describes the network interfaces available on your system
# and how to activate them. For more information, see interfaces(5).

source /etc/network/interfaces.d/*

# The loopback network interface
auto lo
iface lo inet loopback

# The primary network interface
allow-hotplug enp0s3
# iface enp0s3 inet dhcp
# Define Static IP
iface enp0s3 inet static
	address 10.0.117.132
	netmask 255.255.0.0
	gateway 10.0.0.1
You should judge the netmask according to the CIDR. /16 usually means 255.255.0.0, /24 usually means 255.255.255.0, you can find converter on the Internet.
Now open /etc/hosts, delete all the content, and replace with the following.
127.0.0.1 localhost
PUBLIC_IP HOSTNAME.proxmox.com HOSTNAME
Replace the ‘PUBLIC_IP’ with your machine’s public IP and ‘HOSTNAME’ with your hostname. e.g. ‘1.1.1.1 pve.contoso.com pve’.
Now reboot your machine, please.
After rebooting, execute the following command one by one.
apt install gnupg curl -y
----------------------------
rm /etc/apt/sources.list.d/*.list
rm /etc/apt/sources.list
----------------------------
echo "# Raspberry Pi Bullseye Repoo
deb http://archive.raspberrypi.org/debian/ bullseye main

# Pimox7 Repo
deb https://mirror.frank-ruan.com/pimox7/ dev/

# Debian Rep0
deb http://deb.debian.org/debian bullseye main contrib non-free

# Security Updated
deb http://security.debian.org/debian-security bullseye-security main contrib non-free" > /etc/apt/sources.list
----------------------------
apt-key adv --keyserver keyserver.ubuntu.com --recv-keys 82B129927FA3303E
----------------------------
curl https://mirror.frank-ruan.com/pimox7/KEY.gpg | apt-key add -
----------------------------
apt update
----------------------------
apt install zfsutils-linux -y
----------------------------
apt upgrade -y
----------------------------
Note: If you are in China, replace
mirror.frank-ruan.comtomirror-cdn.frank-ruan.com. The first one is powered by CloudFlare, and the second one is powered by CacheFly, which is faster in China.
Now the preparation is done, let’s install Proxmox VE.
Since the installation would interrupt the SSH session, causing the installation to be interrupted, we need to switch back to Cloud Shell and execute the following.
apt install proxmox-ve
During the installation, the wizard will ask you to configure the mail server. Leave default but put your domain which is pointed to your machine in the ‘System mail name’ field.
After installation, we need to install some dependencies.
Execute the following command.
apt install git bison flex autoconf libtool swig gettext python3 python3-dev python3-pip -y
git clone https://gitlab.com/apparmor/apparmor.git
cd apparmor
export PYTHONPATH=$(realpath libraries/libapparmor/swig/python)
export PYTHON=/usr/bin/python3
export PYTHON_VERSION=3
export PYTHON_VERSIONS=python3
cd ./libraries/libapparmor
./autogen.sh
./configure --prefix=/usr --with-perl --with-python
make
make install
cd ../../binutils/
make
make install
cd ../parser/
make
make install
cd ../utils/
make
make install

reboot
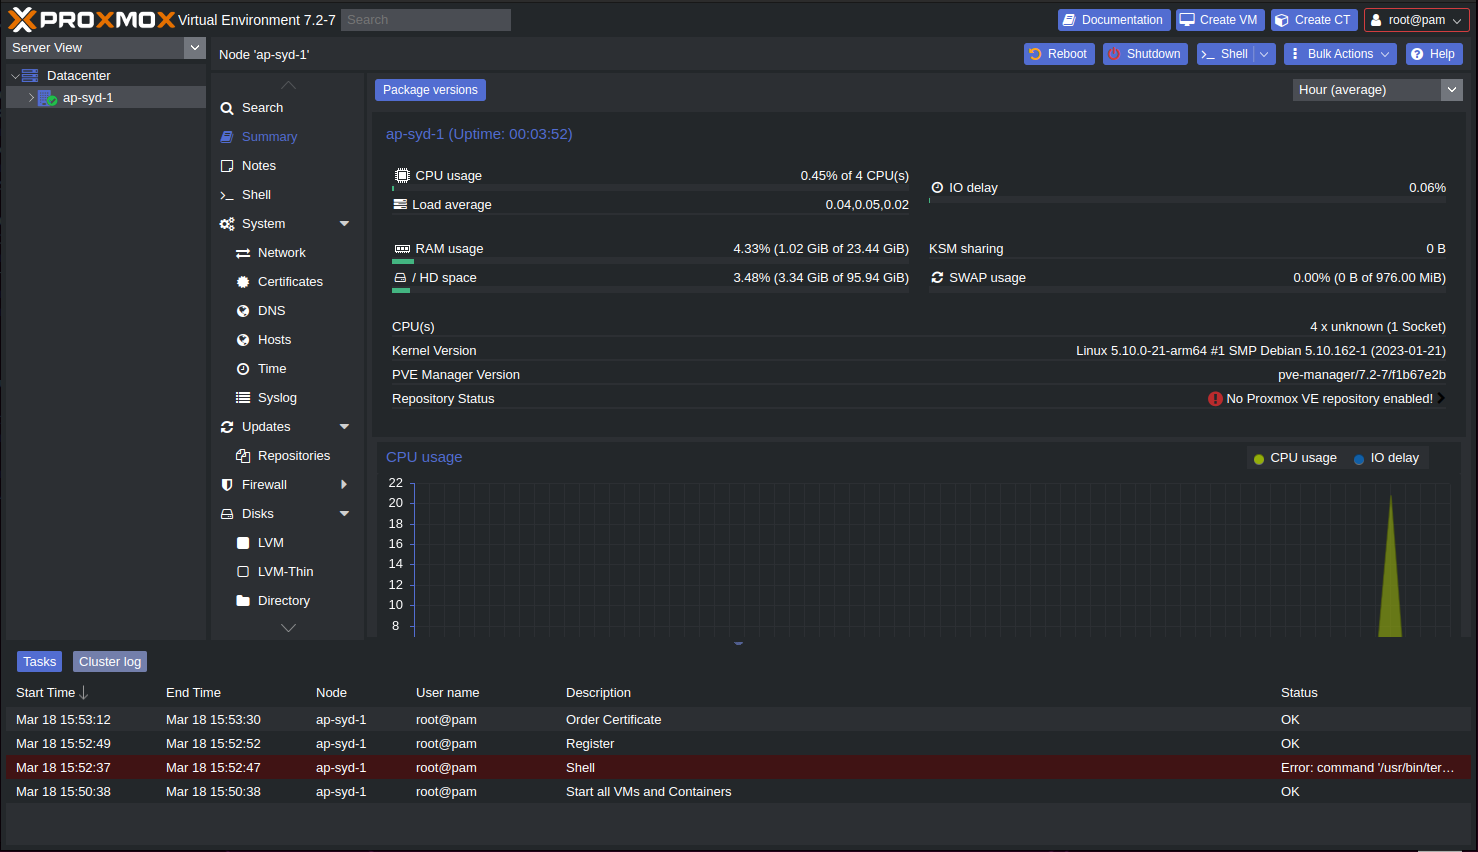
Hooray!
You now have a fully functional Proxmox VE on OCI! Visit https://IP:8006 for more configurations.
Dark mode?
Of course, execute the following command for dark mode (unofficial).
bash <(curl -s https://raw.githubusercontent.com/Weilbyte/PVEDiscordDark/master/PVEDiscordDark.sh ) install
Final Thoughts
I have to say this is a really useful way to install PVE on an ARM machine. But you need to remember that this way is totally unofficial and unsupported. You will get no updates whatsoever (unless someone jumps out to update it). Proxmox officially doesn’t offer any prebuilt binaries for aarch64 architecture.
You need to config the network bridge, and network passthrough by yourself and I will post a tutorial later.
Again, you can’t install real virtual machines on top of this, you can only fire up LXC containers since Nested Virtualization is disabled.