Configuring network for Proxmox VE on OCI ARM
A few months ago, I posted a tutorial on how to install Proxmox VE on the ARM instance of OCI, and this is a follow-up. Original Post
Goal
The goal is to create a container that has NAT IPv4 (only for IPv4 connection, no ports opened, and with PVE, it is not possible to do that, at least with no official methods), and has a dedicated IPv6 address.
Requirements
You need to have a working PVE instance running on OCI, tutorial above. And that is pretty much it.
Tutorial
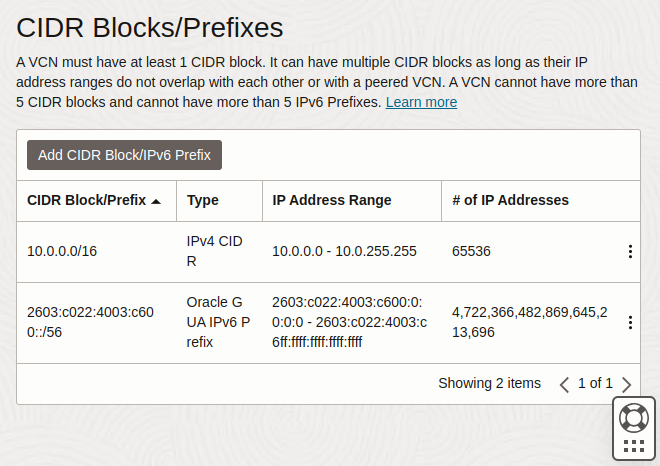
Log in to your Oracle Cloud console. Go to Networking/Virtual Cloud Networks, and choose your VCN, usually, it is default-vcn, go to CIDR Blocks/Prefixes, and click Add CIDR Block/IPv6 prefix. We will leave IPv4 CIDR Blocks alone and just create an IPv6 CIDR.
It will look like this. (Anything mentioned in this tutorial will be wiped afterward, so don’t try to attack me. XD)
Go to Subnets in the side panel and click your subnet (usually there is only one, but if there are multiple, make sure this is the one that your PVE instance used). Go to IPv6 Prefixes and click Add IPv6 Prefix. Add an Oracle Cloud assigned /64 to your subnet.

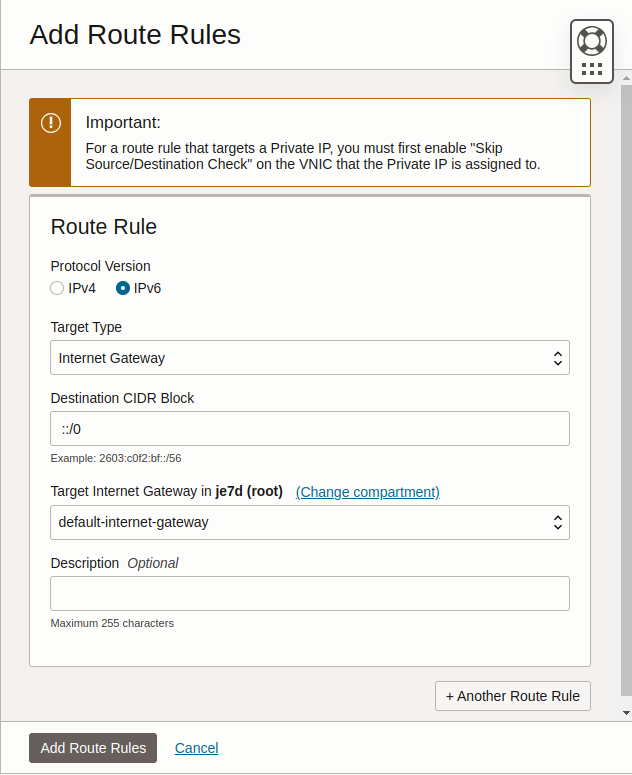
Go back to the VCN page, click Route Tables, click Add Route Tables, and set it up as the following.
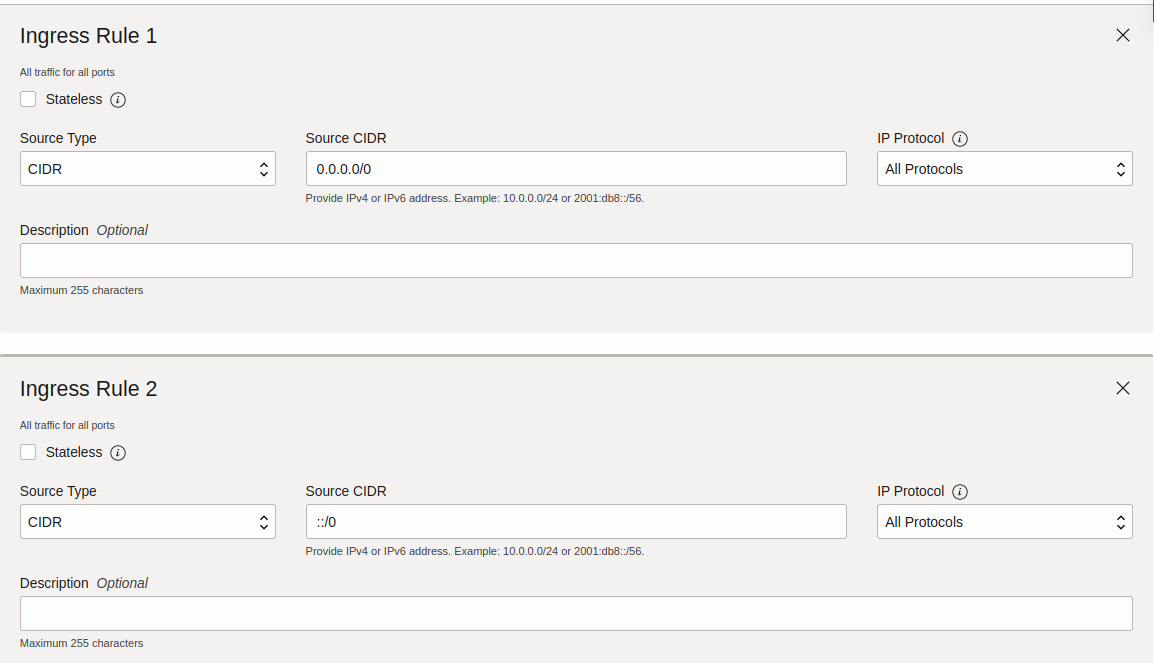
Go back to the VCN page and go to Security Lists. Create a security list and set it up like the following (easily speaking, you just need to ensure both ingress and egress IPv4 and IPv6 can be accepted from anywhere, which is 0.0.0.0/0 for IPv4 and ::/0 for IPv6). The below only shows the ingress setup, but it is identical to the egress. You need to set up both.
Okay, that is all for the network part, and now it is time to configure the network interface.
Due to the limitations of OCI, one virtual machine can only have 3 VNICs attached, thus you can only fire up 2 containers… Which sucks. But I have thought of a workaround is that if you ask the container to obtain an IPv6 address directly from the VNIC instead of passing through a whole NIC to the container, it may get over the limitation since OCI’s VCN supports DHCP. But currently I haven’t dealt with it because as a beginner I am not very familiar with Proxmox and if anyone knows how to do that, feel free to comment or contact me
Go to your instance page, click Attached VNICs, and click Create VNIC. Choose Normal setup: subnet as the Network and choose your subnet. Leave anything by default and create it. (If you want to create a container with a dedicated IPv4 address, select Assign a public IPv4 address, but this will not be stated here and it may work just fine without any changes.)
Go to the management page of your newly created VNIC, click IPv6 addresses, Assign IPv6 Address, and allocate a new IPv6 address.
Now log in to your PVE console, we are going to configure the bridge.
Go to Shell and open /etc/network/interfaces and add the following lines.
auto vmbr0
iface vmbr0 inet static
        address 10.200.0.1/24
        bridge_ports none
        bridge_stp off
        bridge_fd 0
        post-up echo 1 > /proc/sys/net/ipv4/ip_forward
        post-up iptables -t nat -A POSTROUTING -s '10.200.0.0/24' -o enp0s3 -j MASQUERADE
        post-down iptables -t nat -D POSTROUTING -s '10.200.0.0/24' -o enp0s3 -j MASQUERADE
This will create a /24 LAN CIDR, 10.200.0.0/24, and we asked iptables to forward all traffic to our default network interface, enp0s3.
Use systemctl restart networking to restart the networking service.
Go back to the PVE console, and create a container. (Don’t forget to download the CT template first.)
It is suggested to download the template from here: https://uk.lxd.images.canonical.com/images/
In the Network section, configure as the following shows.
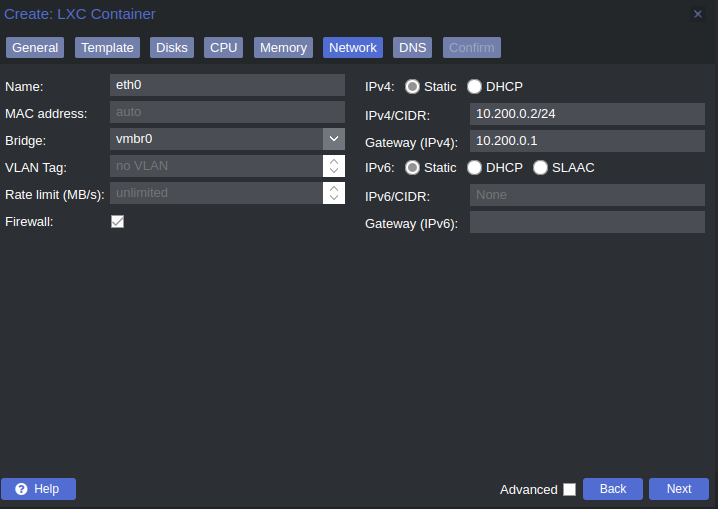
We are not setting IPv6 here, instead, we will pass through the entire newly created NIC to it.
Do NOT start the container after creation.
After the creation, go back to the terminal, and use ip addr to check the name of the newly created NIC. It is usually stated DOWN. In my case, it is enp1s0.
Open the container configuration with your favorite editor, located in /etc/pve/lxc/CONTAINER_ID.conf, replace CONTAINER_ID with your container’s ID. Add the following lines to the file.
lxc.net.1.type: phys
lxc.net.1.link: NIC NAME (e.g. enp1s0)
lxc.net.1.flags: up
Replace the NIC NAME with your NIC’s name. The final configuration looks like this.
arch: arm64
cores: 1
features: nesting=1
hostname: blogtest
memory: 2048
net0: name=eth0,bridge=vmbr0,firewall=1,gw=10.200.0.1,hwaddr=06:22:B0:DD:BB:CC,ip=10.200.0.3/24,type=veth
ostype: debian
rootfs: local:2000/vm-2000-disk-0.raw,size=8G
swap: 2048
unprivileged: 1
lxc.net.1.type: phys
lxc.net.1.link: enp1s0
lxc.net.1.flags: up
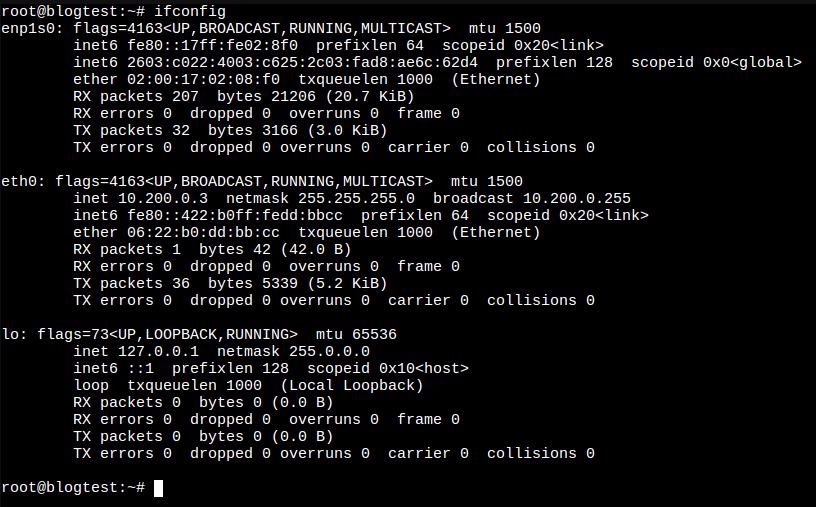
After that, fire up the container. Use dhclient -6 enp1s0 (or your NIC name) to obtain an IPv6 address from the NIC, you can also state a static one in the interface file, but I won’t state it here.
The final setup looks like this.
Note that if eth0 cannot grab a LAN IP, go to the DNS section to setup the DNS. Make it one.one.one.one and 1.1.1.1 is fine. Also, the DHCP client has to be executed manually by default, so it is recommended to write it to the interface file, which I won’t state it here.
That’s it, you now have a fully functional container running on completely free ARM instance. Enjoy! :)